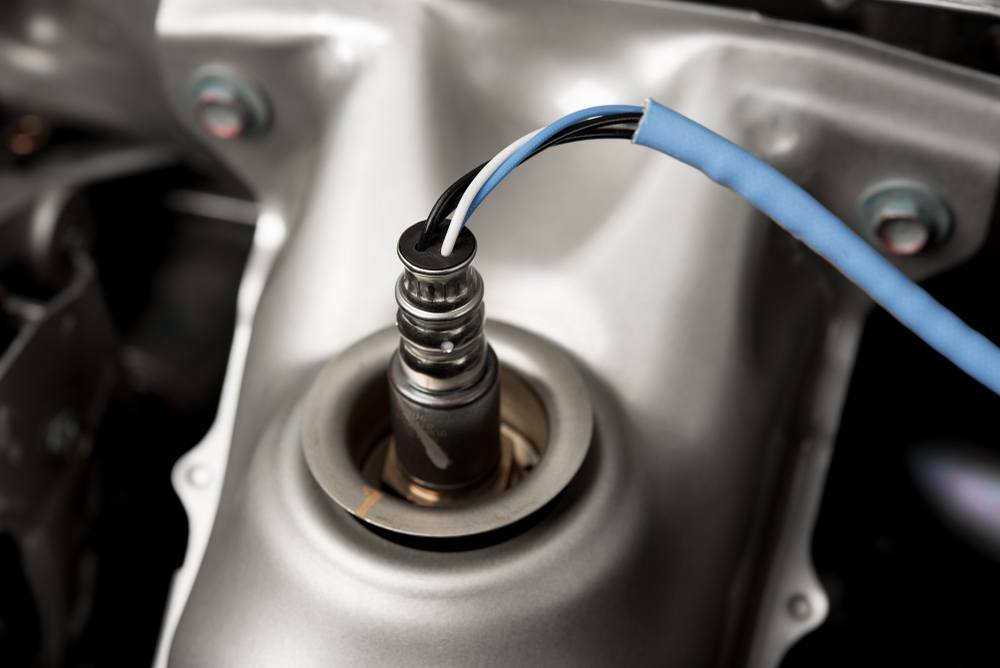
A step-by-step guide to lambda (oxygen) sensor replacement for UK drivers — covering symptoms, fault codes, costs and why this small component matters for fuel economy and MOT compliance.
The lambda sensor — also known as an oxygen sensor or O2 sensor — is one of the most important feedback components in a modern car’s engine management system, yet it is one of the least understood by UK drivers. When it fails, the consequences range from increased fuel consumption and emissions to MOT failure and, in the worst cases, catalytic converter damage. This guide explains what a lambda sensor does, how to diagnose a failing one, and how to replace it safely at home.
Key Points
- The lambda sensor monitors exhaust oxygen content and feeds data to the ECU to maintain the correct air-fuel mixture
- A failing sensor causes increased fuel consumption, rough running, failed emissions tests and potential catalytic converter damage
- Most modern UK cars have two lambda sensors — one before and one after the catalytic converter
- Replacement costs range from approximately £30 DIY (parts only) to £200 at a UK garage
- Always use a vehicle-specific or universal-fit sensor with the correct wire count — lambda sensors are not universally interchangeable
- A faulty lambda sensor is one of the most common causes of MOT emissions failure on UK petrol cars
What Does a Lambda Sensor Do?
The lambda sensor is a small electrochemical device mounted in the exhaust pipe that measures the oxygen content of the exhaust gases passing through it. It generates a small voltage signal — typically oscillating between 0.1V (lean) and 0.9V (rich) — that the ECU uses to continuously adjust the fuel injection duration and maintain the stoichiometric air-fuel ratio of 14.7:1 for petrol engines. This closed-loop control is fundamental to both fuel efficiency and emissions compliance.
Most modern UK cars operate with at least two lambda sensors. The upstream (pre-cat) sensorprovides the primary closed-loop fuelling feedback. The downstream (post-cat) sensormonitors the efficiency of the catalytic converter by comparing the exhaust composition before and after the cat. If the downstream sensor detects that the catalytic converter is no longer cleaning the exhaust effectively, it triggers a fault code — even if the sensor itself is functioning correctly.
Symptoms of a Failing Lambda Sensor
- Engine management warning light — fault codes P0130–P0167 cover the full range of lambda sensor faults by bank and position
- Increased fuel consumption — a failed upstream sensor causes the ECU to run in open-loop mode, defaulting to a fixed (often rich) fuelling map
- Rough idle or hesitation — particularly on deceleration or light throttle, where lambda feedback is most critical
- Failed MOT emissions test — a faulty lambda sensor causing incorrect fuelling is one of the most common causes of petrol car emissions failures at MOT
- Black smoke from the exhaust — indicates rich running caused by an absent or incorrect lambda signal
- Catalytic converter damage — prolonged rich running caused by a failed upstream sensor can overheat and destroy the catalytic converter
From my experience, increased fuel consumption is often the first noticeable symptom of a failing lambda sensor — particularly on urban driving cycles where the engine frequently transitions between fuelling maps. A car that has dropped noticeably in mpg without any other obvious fault is always worth checking for lambda sensor fault codes before any more expensive investigation.
Upstream vs Downstream: Which Sensor Has Failed?
| Sensor Position | Location | Primary Function | Common Fault |
|---|---|---|---|
| Upstream (pre-cat) | Before catalytic converter | Fuelling feedback to ECU | Aging, heat damage, contamination |
| Downstream (post-cat) | After catalytic converter | Catalytic converter monitoring | Aging, catalytic converter failure |
The upstream sensor is more critical for day-to-day engine performance. The downstream sensor failure is often triggered not by the sensor itself but by a deteriorating catalytic converter that can no longer clean the exhaust to the required standard. If the downstream sensor code is accompanied by a catalytic converter efficiency code (P0420/P0430), the converter itself may need replacing rather than just the sensor.
Tools and Parts You Will Need
| Item | Notes |
|---|---|
| Replacement lambda sensor | Match wire count (1, 2, 3 or 4 wires) and thread pitch |
| Lambda sensor socket (slotted, 22mm) | Specially slotted to allow the sensor wire to pass through |
| Breaker bar or ratchet | Sensors are often extremely tight — particularly on high-mileage cars |
| Penetrating spray (WD-40 or equivalent) | Essential — apply generously and leave for 15–20 minutes minimum |
| Anti-seize compound | Apply to new sensor threads — prevents future seizure |
| OBD-II reader | For reading and clearing fault codes |
| Heat-resistant gloves | Exhaust components retain heat for a long time |
The most common reason lambda sensor replacement fails at DIY level is a seized sensor that rounds off or snaps during removal. Always soak thoroughly with penetrating fluid — ideally the night before — and apply heat to the bung (not the sensor) using a heat gun or torch if necessary. Never attempt removal on a cold engine.
Step-by-Step: Replacing a Lambda Sensor
- Read the fault codes using an OBD reader to identify which sensor has failed (bank, upstream or downstream) and note the exact code
- Warm the engine to operating temperature, then switch it off and allow to cool for 20–30 minutes — the exhaust must be warm enough for the metal to expand (making removal easier) but not hot enough to cause burns
- Locate the faulty sensor — upstream sensors are typically on the exhaust manifold or downpipe; downstream sensors are on the main exhaust pipe after the catalytic converter
- Apply penetrating spray generously to the sensor bung threads and allow to soak for at least 15 minutes
- Disconnect the sensor wiring connector — press the retaining clip and pull the connector apart. On upstream sensors the connector is usually clipped to the engine bay bodywork
- Unscrew the old sensor using the lambda sensor socket and breaker bar — anticlockwise. Apply firm, steady pressure rather than sharp jerks. If it will not move, apply more penetrating fluid and wait
- Apply a thin film of anti-seize compound to the threads of the new sensor — avoid getting compound on the sensing element itself
- Thread the new sensor in by hand first — lambda sensor threads are fine and easy to cross-thread in tight access conditions
- Tighten to specification — typically 40–55 Nm for most sensors. Do not overtighten
- Route and reconnect the wiring connector — ensure the wire is clear of hot exhaust surfaces and moving parts
- Use the OBD reader to clear the fault codes, start the engine and allow it to reach operating temperature. Monitor for code return on a short test drive
Lambda Sensor Replacement Costs in the UK
| Vehicle Type | Typical Garage Cost | DIY Parts Cost |
|---|---|---|
| Small petrol hatchback | £80–£150 | £20–£50 |
| Family hatchback / saloon | £90–£170 | £25–£70 |
| Premium brand (BMW, Audi, Mercedes) | £120–£220 | £40–£100 |
| Downstream sensor (post-cat) | £70–£140 | £15–£45 |
Prices are approximate 2026 UK market estimates. Access difficulty — particularly on turbocharged engines with sensors in tight locations — can increase labour time significantly.
For context on UK MOT emissions testing and what failure thresholds apply to your vehicle’s registration year, the UK government’s MOT testing standards provide detailed information on the emissions limits assessed at annual inspection. For related exhaust system maintenance, our guides on EGR valve replacement and DPF cleaning cover the other emissions components most commonly faulting alongside lambda sensors on high-mileage UK engines.
How do I know which lambda sensor has failed?
An OBD reader will identify the fault code and specify the sensor by bank (Bank 1 or Bank 2 on V-engines) and position (upstream/downstream). On a four-cylinder in-line engine, there is only one bank — so the code will specify simply upstream (Sensor 1) or downstream (Sensor 2).
Can I drive with a faulty lambda sensor?
Yes, but not without consequences. The engine will run in open-loop mode, defaulting to a fixed fuelling map that is typically richer than optimal. This increases fuel consumption, increases emissions, and over time risks overheating the catalytic converter. The vehicle will also fail its MOT emissions test. Prompt replacement is strongly recommended.
Do both lambda sensors need replacing at the same time?
Not necessarily. Replace only the failed sensor identified by the fault code. However, on a high-mileage vehicle where one sensor has failed, the other is likely near the end of its service life. Replacing both simultaneously saves labour time, particularly on sensors in difficult access positions.
Will a new lambda sensor improve fuel economy?
Yes — if the old sensor was causing incorrect fuelling, a new one can restore the closed-loop feedback that optimises the air-fuel ratio. Drivers often report a noticeable improvement in fuel economy immediately after lambda sensor replacement, particularly on vehicles where the fault had been present for an extended period.
What is the difference between a narrowband and wideband lambda sensor?
A narrowband sensor generates a simple rich/lean voltage signal and is used on older and lower-specification engines. A wideband sensor measures the exact air-fuel ratio across a broad range and is used on modern direct-injection and turbocharged engines for more precise fuel control. Replacing a wideband sensor with a narrowband unit will cause immediate fuelling faults — always match the sensor type exactly.
Can a faulty lambda sensor damage the catalytic converter?
Yes. A failed upstream sensor that causes persistent rich running sends excess unburned fuel into the catalytic converter, overheating it and melting the internal ceramic substrate. Catalytic converter replacement on a UK family car typically costs £300–£800 — many times the cost of a lambda sensor.
Conclusion
The lambda sensor is one of the most cost-effective maintenance items on a modern UK petrol car — a £30–£70 component whose failure, if left unaddressed, risks several hundred pounds of downstream damage to the catalytic converter and a certain MOT emissions failure. Replacement is one of the most accessible DIY engine jobs available, with the only real challenge being a seized sensor on a high-mileage vehicle. Applying penetrating fluid generously, working on a warm but not hot exhaust, and using the correct slotted lambda sensor socket resolves that challenge in the vast majority of cases. In my experience, UK drivers who address lambda sensor fault codes promptly — rather than clearing the warning light and hoping the fault resolves — save significantly in the long run and maintain better fuel economy throughout. For a complete engine and emissions health check, pairing lambda sensor replacement with an ignition coil inspection and EGR valve check covers the three most common engine management faults on UK petrol and diesel cars.
How to Replace Strut Top Bearings: The Complete UK Driver’s Guide
A step-by-step guide to strut top bearing (top mount) replacement for UK drivers — covering symptoms, costs, tools and the importance of correct spring compression.
Strut top bearings — also called top mounts or strut mount bearings — are among the most frequently overlooked suspension components on UK cars, yet they are responsible for a significant proportion of the knocking, creaking and poor handling characteristics that drivers attribute to other causes. When a strut top bearing fails, it affects steering precision, ride quality and tyre wear, and it represents an MOT failure risk. This guide covers everything UK drivers need to know about diagnosing and replacing strut top bearings safely and correctly.
Key Points
- Strut top bearings allow the front suspension strut to rotate as the steering turns — wear causes knocking, poor steering feel and tyre wear
- The most distinctive symptom is a single knock or clunk from the front suspension when turning at low speed or traversing a speed bump
- Always use a spring compressor when working on MacPherson strut assemblies — a released suspension spring is potentially fatal
- Replacement costs range from approximately £30 DIY (parts only) to £250 at a UK garage per side
- Top mounts also incorporate a rubber isolator that absorbs road vibration — a collapsed isolator transmits harshness directly into the cabin
- Always replace both sides simultaneously — strut top bearings wear at comparable rates and asymmetric wear affects steering balance
What Is a Strut Top Bearing?
On a MacPherson strut front suspension — the most common arrangement on UK front-wheel-drive cars — the suspension strut consists of a combined shock absorber and spring assembly. The top of this strut assembly connects to the vehicle body via a top mount, which incorporates a bearing (or thrust bearing) that allows the strut to rotate as the front wheels steer left and right.
The top mount assembly typically comprises three elements: the bearing itself (a ball bearing or needle roller bearing that allows rotation), a rubber isolator (that absorbs road shock and vibration between the strut and the body), and a metal mounting plate that bolts to the inner wing. When the bearing wears, it develops rough or notchy rotation, creating noise and vague steering feel. When the rubber isolator collapses or tears, vibration and road noise are transmitted directly into the cabin.
Symptoms of Worn Strut Top Bearings
- Single knock or clunk when turning at low speed — the most distinctive symptom, often described as a knock from the front when pulling out of a junction or navigating a roundabout
- Knocking over speed bumps or potholes — particularly a single thud rather than a progressive rattle
- Stiff, notchy or heavy steering — the bearing roughness creates resistance when the strut rotates under steering input
- Vague or imprecise steering feel — worn bearing play introduces looseness into the steering response
- Vibration or harshness through the steering wheel — caused by a collapsed rubber isolator transmitting road shock directly
- Uneven tyre wear — a collapsed top mount allows the strut to sit at a slightly incorrect angle, affecting camber and accelerating inner or outer tyre wear
From my experience, the single knock when turning at low speed is the most reliable and distinctive symptom of a failing strut top bearing on a UK car — it is rarely confused with other suspension faults once you have heard it. The knock often appears on cold mornings before the bearing warms up and becomes slightly more compliant.
Tools and Parts You Will Need
| Item | Notes |
|---|---|
| Replacement strut top mount/bearing | Replace both sides — confirm vehicle-specific part |
| Spring compressor (hire or purchase) | Non-negotiable safety requirement — never work on a loaded spring without compressors |
| Torque wrench and socket set | Top nut and strut mounting bolts must be torqued correctly |
| Strut nut socket or deep impact socket | The top nut retaining the strut rod is often a special size |
| Allen key bit (internal hex) | Strut rod is held with an internal hex while the top nut is removed |
| Penetrating spray | For corroded top mount bolts — extremely common on UK cars |
| Rubber mallet | For persuading the top mount off the strut |
Spring compressors are safety-critical equipment. A suspension spring under load contains enormous stored energy — if released suddenly, it can cause fatal injury. Use a quality pair of screw-type spring compressors, ensure they are properly seated on the spring coils, and never remove the strut top nut without the spring fully compressed. This is not a job to rush.
Step-by-Step: Replacing a Strut Top Bearing
This procedure covers a standard MacPherson strut front suspension assembly. The process may vary slightly depending on vehicle — always consult a vehicle-specific workshop manual for torque specifications.
- Jack the vehicle and place on axle stands. Remove the front wheel
- Support the hub carrier with a trolley jack before disconnecting anything — this prevents the spring from extending suddenly and the brake hose or ABS sensor wire from being overstretched
- Remove the three or four top mount bolts in the engine bay / inner wing — these are the nuts visible on the suspension turret. Spray with penetrating fluid first if corroded
- Disconnect the ABS sensor wire and brake hose from any clips on the strut body
- Remove the lower strut pinch bolt where the strut base clamps to the hub carrier, then push the hub carrier downward to free the strut
- Lower the strut assembly out of the vehicle carefully
- Fit the spring compressors onto opposing sides of the coil spring, ensuring the hooks are securely seated on the spring coils. Compress the spring until all load is removed from the top mount — verify by attempting to move the top mount by hand
- Hold the strut rod using the internal hex bit and remove the top nut with the correct socket
- Remove the top mount assembly — bearing plate, rubber isolator and any associated components. Note the orientation of each component for reassembly
- Fit the new top mount assembly in the correct orientation, refit and torque the top nut while holding the strut rod with the hex bit
- Carefully and evenly release the spring compressors — ensure the spring end seats correctly in the lower spring perch before fully releasing
- Refit the strut assembly into the vehicle — guide the top studs through the inner wing holes and refit the top mount nuts finger tight
- Refit the lower strut pinch bolt and torque to specification — typically 70–100 Nm
- Torque the top mount nuts from the engine bay to specification — typically 20–30 Nm
- Reconnect the ABS sensor and brake hose clips, refit the wheel, lower the vehicle and carry out a final torque check
Do I Need a Wheel Alignment After Top Mount Replacement?
On most UK cars, replacing only the strut top mount without changing the shock absorber or spring does not require a full four-wheel alignment. However, if the top mount incorporates an eccentric camber adjustment plate — found on some vehicles as a factory alignment adjustment — any replacement may alter the camber setting and require realignment.
As a precaution, any time front suspension geometry components are disturbed, it is good practice to have the alignment checked. This is particularly relevant if the old top mount had collapsed significantly — a collapsed mount can introduce camber error that persists until corrected. For related front suspension work that benefits from combined access, our guides on wheel bearing replacement and track rod end replacement cover the other components most commonly addressed at the same service.
Strut Top Bearing Replacement Costs in the UK
| Vehicle Type | Typical Garage Cost (per side) | DIY Parts Cost |
|---|---|---|
| Small hatchback (Ford Fiesta, VW Polo) | £80–£160 | £15–£40 |
| Family hatchback (Golf, Focus, Astra) | £100–£180 | £20–£55 |
| Premium brand (BMW, Audi, Mercedes) | £130–£250 | £35–£90 |
| Including shock absorber replacement | Add £80–£200 | Add £40–£120 |
Prices are approximate 2026 UK market estimates. Both sides replaced simultaneously typically saves 30–40% on total labour compared to separate visits.
A failed strut top bearing that causes knocking is likely to be noted as an MOT advisory or failure depending on the extent of the play. The UK government’s MOT testing standardsinclude top mount condition as part of the suspension inspection — excessive play or a collapsed rubber isolator can result in a failure. For authoritative information on suspension safety standards for UK vehicles, Thatcham Research provides useful context on how suspension component failures are categorised in UK safety assessments.
How do I know if my strut top bearing has failed?
The most reliable test is to have a helper turn the steering from lock to lock while you listen at the inner wing — a failed bearing produces a scraping, clicking or crunching sensation that can often be felt through the inner wing panel as the strut rotates. A single knock over bumps points to the rubber isolator component of the top mount.
Are strut top bearings the same as top mounts?
The terms are often used interchangeably, but technically a top mount refers to the entire assembly (bearing, rubber isolator and mounting plate), while a strut top bearing refers specifically to the rotational bearing element within it. Most aftermarket replacement units are sold as complete top mount assemblies including the bearing.
Can I replace strut top bearings without removing the spring?
No — not safely. To access and replace the bearing, the spring must be compressed and the strut top nut removed. The spring load must be transferred to the compressors before the nut is removed. Attempting to remove the top nut with the spring under load risks a catastrophic spring release.
Will worn strut top bearings cause an MOT failure?
Excessive play in the top mount bearing or a visibly collapsed isolator can cause an MOT failure under the suspension inspection category. An advisory is common at the early stages of wear; a failure occurs when the play is judged to affect roadworthiness or when the mount is structurally compromised.
How long do strut top bearings last on a UK car?
Typically between 60,000 and 100,000 miles, though UK road conditions — particularly pothole impacts and road salt — can accelerate wear significantly. Bearings on vehicles used in urban areas with poor road surfaces often wear faster than those used predominantly on motorways.
Should I replace the shock absorber at the same time?
If the shock absorber is showing signs of oil leakage or reduced damping, replacing it at the same time as the top mount makes strong economic sense — the strut assembly is already out of the car and the additional labour is minimal. A new top mount fitted to a worn shock absorber will not restore the ride quality that both components together can deliver.
Conclusion
Strut top bearings are a wear item whose condition directly affects steering precision, ride quality and tyre longevity — yet they are frequently overlooked until the knocking they produce becomes too loud to ignore. Replacing them at the first signs of wear, rather than waiting for a pronounced fault, avoids the compounding tyre wear and steering imprecision that a collapsed mount causes. The job requires respect for the spring compression process above all else — but for a mechanically competent home mechanic with the correct equipment, it is entirely achievable. In my experience, combining top mount replacement with shock absorber inspection and a wheel bearing check during the same workshop session delivers the greatest improvement in suspension feel and represents excellent value per pound spent. For a comprehensive front suspension service, our guides on track rod end replacement and brake calliper replacement cover the remaining front-end components most likely to require attention at similar mileages.