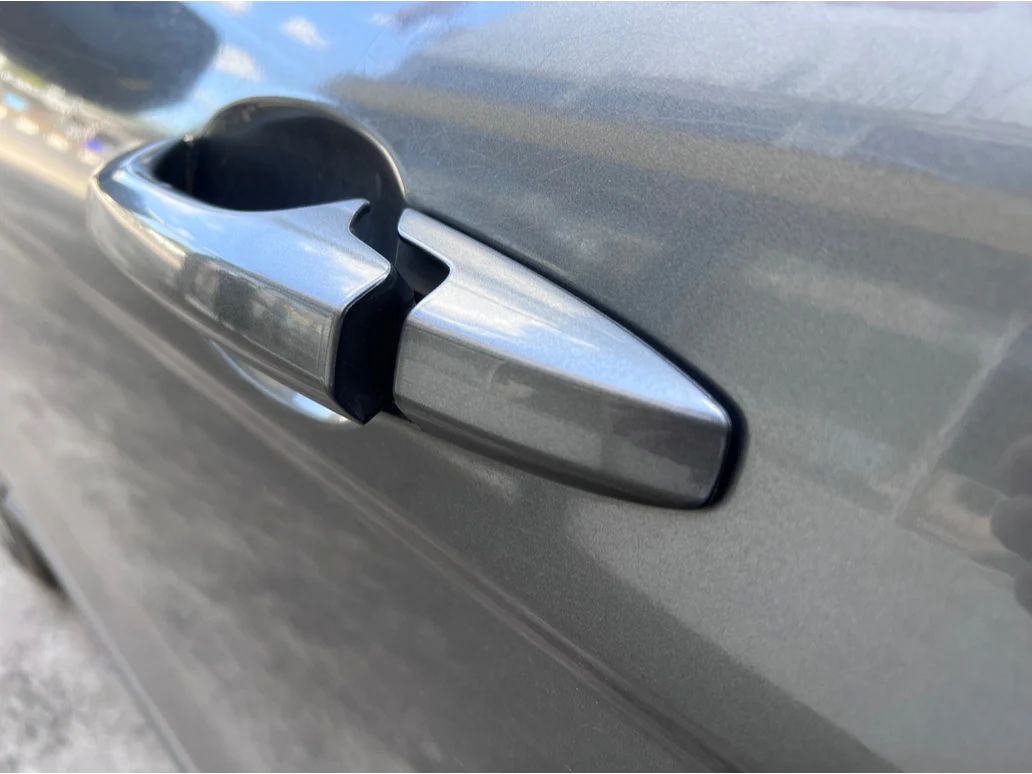
A practical guide for UK drivers on diagnosing and replacing a broken interior or exterior car door handle — covering symptoms, costs, tools and step-by-step instructions.
A faulty car door handle is one of those faults that starts as a minor inconvenience and quickly becomes a genuine safety issue — particularly if a rear passenger door cannot be opened from inside in an emergency. Whether your exterior handle has snapped, your interior release no longer catches, or the mechanism behind the door card has failed, this guide covers everything you need to know about diagnosing and replacing a car door handle on a UK vehicle, with or without a trip to the garage.
Key Points
- Door handle failures are among the most common bodywork faults on UK cars over five years old
- Both interior and exterior handles can fail — causes include UV degradation, metal fatigue, broken linkage rods and worn latch mechanisms
- Most replacements are accessible DIY jobs requiring basic trim tools and a socket set
- Replacement costs range from approximately £20 DIY (parts only) to £150 at a garage depending on vehicle
- Always test both the interior and exterior handle operation after fitting — a poorly adjusted linkage rod can leave you locked in or out
- A door that cannot be opened from either side is an MOT advisory and may affect vehicle insurance validity
Why Car Door Handles Fail
Car door handles are subject to constant mechanical stress — pulled, twisted and released hundreds of times per year, often in cold or wet UK weather conditions that accelerate wear on plastic components and metal pivot points. Exterior handles on UK cars are also exposed to road salt, UV degradation and impact damage from car park incidents.
The most common failure points are:
- Snapped plastic handle body — particularly on older vehicles where UV exposure has embrittled the plastic
- Broken or detached linkage rod — the metal rod that connects the handle to the door latch. Can detach from its clip without any external impact
- Worn or broken return spring — causes the handle to feel loose, floppy or unresponsive
- Corroded or seized exterior handle mechanism — common on UK cars exposed to road salt
- Broken interior release lever — particularly on rear doors, where the mechanism is simpler but the plastic lever is prone to snapping under sharp force
From my experience, the most frustrating door handle failures are broken interior linkage rods on rear doors — the door closes perfectly and looks fine from outside, but passengers cannot exit without winding down the window and using the exterior handle. This is not just inconvenient — it is a genuine safety concern in any emergency situation.
Identifying the Type of Failure
Before ordering parts, it is important to correctly identify what has failed. Pulling the door card and visually inspecting the mechanism takes around 15 minutes and prevents ordering the wrong component.
| Symptom | Most Likely Cause |
|---|---|
| Handle pulls but door does not open | Broken or detached linkage rod |
| Handle feels floppy with no resistance | Broken return spring or pivot pin |
| Handle snapped off completely | Broken handle body — replace handle assembly |
| Interior release works but exterior does not | Exterior handle linkage or exterior handle body |
| Exterior works but interior does not | Interior release lever or interior linkage rod |
| Child lock active (rear door) | Check child lock switch on door edge before dismantling |
| Door locked and neither handle works | Central locking fault or seized latch — separate diagnosis required |
Before removing any trim panels, always check the child lock on the door edge (rear doors only). A yellow or red switch on the door edge, set to the locked position, will prevent interior release regardless of handle condition. This is the most common cause of a “faulty” rear interior door handle on UK family cars.
Tools and Parts You Will Need
| Item | Notes |
|---|---|
| Replacement door handle | Specify interior or exterior, correct door position, and colour/finish |
| Trim panel removal tools | Plastic pry tools — metal screwdrivers will damage trim clips |
| Torx or Philips screwdriver set | Most door card screws are hidden under covers or in grab handles |
| Snap ring pliers | For removing linkage rod retaining clips |
| Cable ties or trim clips | Replacements for broken door card retaining clips |
| Masking tape | Protect painted surfaces around the door handle recess |
Step-by-Step: Replacing an Interior Door Handle
Interior handle replacement requires removing the door trim card. This varies significantly between vehicles, but the following covers the general procedure for most UK passenger cars.
- Wind the window fully down before starting — this allows easier access and prevents accidental glass damage during reassembly
- Remove any visible screws in the door card — typically hidden under a cover in the door pull handle recess and behind the mirror adjustment switch or speaker grille
- Remove the window winder handle on manual windows — a special hook tool releases the retaining clip behind the handle
- Pry the door card away from the door using plastic trim tools, working around the perimeter to release the push-fit clips. Start at the bottom and work upward — the card usually lifts off at the top once all clips are released
- Disconnect any electrical connectors (window switches, mirror controls, speaker wiring) before fully removing the panel — photograph their positions first
- Peel back the plastic vapour barrier carefully — it is bonded with mastic adhesive. You will need to re-seal it on reassembly
- Locate the interior handle and identify the linkage rod connection — it attaches to the handle lever via a plastic retaining clip
- Disconnect the linkage rod by releasing the retaining clip and unhooking the rod end
- Remove the handle retaining screws (typically two) and withdraw the old handle from the door card or door structure
- Fit the new handle, reconnect the linkage rod and test operation before reassembly — the latch should release fully when the handle is pulled
- Refit the vapour barrier using new mastic adhesive or trim adhesive tape, refit the door card by engaging the top hooks first, then pressing the clips home firmly
Step-by-Step: Replacing an Exterior Door Handle
Exterior handle replacement varies more significantly between vehicles. Some handles are accessed from inside the door after removing the trim panel; others have external screws concealed in the door jamb.
- Remove the door trim panel as described above — most exterior handle mechanisms are only accessible from inside the door
- Peel back the vapour barrier to access the door interior
- Locate the exterior handle assembly — it sits in the door skin recess and is typically retained by one or two bolts accessible from inside the door
- Disconnect both linkage rods from the handle — one for the latch release, one for the lock cylinder if fitted. Note or photograph which rod connects where
- Remove the retaining bolts and withdraw the handle rearward out of the door skin recess. On some vehicles a foam seal around the handle must be transferred to the new unit
- Fit the new handle into the door skin, refit the retaining bolts and reconnect the linkage rods in the correct positions
- Test full operation — exterior pull should release the latch, and the lock cylinder (if fitted) should operate smoothly before reassembly
- Refit the vapour barrier and door card as described above
Matching the Replacement Handle
For exterior handles, colour matching is important on visible bodywork panels. Most UK car manufacturers offer handles in:
- Primed (ready to paint — best for exact colour match)
- Textured black (standard on many economy and crossover models)
- Chrome finish (common on premium and older models)
- Body-coloured (pre-painted to manufacturer colour codes — most convenient but often more expensive)
| Vehicle Segment | Typical Handle Material | Common Failure Mode |
|---|---|---|
| City car / supermini | Plastic body-coloured | UV cracking, linkage rod detachment |
| Family hatchback | Plastic or chrome-effect | Return spring failure, linkage wear |
| Premium (BMW, Audi, Mercedes) | Metal or high-grade plastic | Mechanism wear, flush handle motor failure |
| SUV / crossover | Textured plastic or metal | Linkage rod clip failure, corrosion |
For premium vehicles with flush pop-out door handles — increasingly common on recent models including Mercedes EQC and BMW 7 Series — the mechanism incorporates an electric actuator and proximity sensor. These are significantly more complex to replace and are generally best handled by a franchised dealer or specialist. If your car also shows a warning light related to door latching or central locking, our guide on the spanner warning light and what it means for UK drivers explains how these faults are flagged by the vehicle’s diagnostic system.
Door Handle Replacement Costs in the UK
| Scenario | Typical Garage Cost | DIY Parts Cost |
|---|---|---|
| Interior handle (standard) | £60–£120 | £10–£30 |
| Exterior handle (standard, uncoloured) | £70–£140 | £15–£50 |
| Exterior handle (body-coloured, pre-painted) | £100–£180 | £40–£120 |
| Flush electric handle (premium vehicle) | £200–£500+ | £80–£250 |
Prices are approximate 2026 UK market estimates. Paint matching and respray costs are additional if a primed handle is used.
For broader bodywork repairs combined with a door handle replacement — such as a damaged door skin or wing panel — our guide on wing and fender replacement covers panel removal and refitting in detail.
DIY or Professional Replacement?
Standard interior and exterior door handle replacement is one of the most accessible bodywork DIY jobs on a UK car, provided the correct trim tools are used. The main risks are broken trim clips from using metal pry tools, damaging the vapour barrier, and incorrectly routing linkage rods on reassembly. None of these are irreversible, but they add time and cost to what should be a simple job.
I would recommend this as a DIY job for any driver comfortable following a methodical process — no mechanical experience is strictly required, and vehicle-specific guides and tutorials are available for most UK models. The UK government’s MOT testing standards include door latching security as an assessed item — a door that fails to latch or cannot be opened from the inside is a failure point and should be rectified before any MOT presentation.
How do I open a car door if the handle has broken?
If the exterior handle has broken, try the interior release. If the interior handle has failed, open the window and use the exterior handle from outside if possible. In an emergency, the central locking unlock button inside the car will release the door latch on most vehicles. If neither handle works, contact a locksmith or roadside assistance — do not force the door.
Can I replace a door handle myself without removing the door card?
In most cases, no. The linkage rods connecting the handle to the latch mechanism are only accessible from inside the door, requiring the trim panel to be removed. Some vehicles have access holes in the door structure for limited adjustments, but full handle replacement almost always requires panel removal.
How long does a door handle replacement take?
For an experienced DIY mechanic, a standard interior or exterior handle replacement takes approximately 45–90 minutes per door. The majority of the time is spent removing and refitting the door trim panel correctly without breaking the plastic clips.
Will a broken door handle fail the MOT?
A door that cannot be opened from the inside — particularly a rear passenger door — is an MOT failure under the door latch security assessment. A handle that is cosmetically broken but still functions mechanically may be noted as an advisory rather than a failure, depending on the severity.
How do I know which replacement handle to order?
You need to specify: vehicle make, model and year; door position (front left, front right, rear left, rear right); interior or exterior; and for exterior handles, whether you need a painted, primed or chrome finish. The vehicle’s paint colour code — found on the VIN plate inside the driver’s door jamb — is required if ordering a pre-painted handle.
Why do plastic door handles crack and break?
Prolonged UV exposure causes the polymers in plastic components to become brittle over time — a process called photodegradation. On UK cars, this is exacerbated by frequent temperature cycling between cold winters and warm summers. Handles on sun-facing sides of the vehicle (south or west-facing when parked) typically degrade faster than those on shaded sides.
Is it worth replacing a door handle on a high-mileage car?
Yes, in almost all cases. A functional door handle is a safety and legal requirement, not a cosmetic feature. The cost of replacement is modest, the job is straightforward, and the alternative — leaving passengers unable to exit the vehicle independently — carries real safety and liability implications.
Conclusion
A faulty door handle is a repair that is easy to defer and even easier to fix — the combination of low parts cost, accessible DIY procedure and immediate practical benefit makes it one of the most satisfying quick wins in car maintenance. The key is correctly identifying whether the failure is in the handle body, the linkage rod or the return spring before ordering parts, and using proper plastic trim tools to avoid unnecessary damage to door clips and vapour barriers during the repair. In my experience, the most common mistake is ordering the wrong handle due to insufficient specification — always confirm door position, interior or exterior, and finish before purchasing. For a broader interior refresh alongside the handle replacement, our guides on central armrest fitting and LED footwell lighting installation cover the other most popular interior upgrades UK drivers undertake at the same time.